Tuesday, October 26, 2010

Edge Effects

Double Fade Border

Michelle & Sam; 10.16.2010; 5:31 p.m.; Rexburg, ID; f/8.0; 1/125; Canon Rebel T1i

For this edit I opened the image in Camera Raw and adjusted the exposure. I added blacks and contrast to make the colors pop more. I then took it into Photoshop and cropped it to be 9x7 inches. I went to Image-Canvas size and added one inch to both the height and width to end up with an 8x10 size. I then drew a rectangle on the image using the shape layer rectangular tool and added a layer mask to the shape layer. I chose the Fill Pixels option of the rectangle tool and drew a black rectangle to mask the other rectangle and bring back the image. I reduced opacity of that layer to 61% and then added a motion filter to it. 


Brushed-On Effect


Cobweb Doorknob; 9.29.2010; 10:34 a.m.; Dubois, ID; f/2.8; 1/2000; Sony DSC-HX1

For this edit I opened the image in Camera Raw and increased contrast and clarity to give it a nice, crisp feel. I loved the effect it gave and how it made the cobweb and old texture of the door stand out. I also decreased exposure and saturation. Then I took the image into Photoshop and did a Command A to select all. I loaded the History Brush tool and used the Thick and Heavy Brushes to paint the image back and give it the nice feel that it has. It took me a few tries to get the hang of the brushes, but I loved them after I got used to it. After creating the edges that I wanted, I added some canvas space to increase the border on the outer edges and give it a frame.


Sprayed Edge Effect


Old Chevrolet Building; 9.29.2010; 10:36 a.m.; Dubois, ID; f/2.8; 1/1000; Sony DSC-HX1

For this image I brought it into Photoshop and used the rectangle Marquee tool to drag a rectangle about an inch from the edges of the picture. I then applied the Quick Mask Mode and added a Sprayed Stroke filter to give the edges the effect that they have. I increased the length and radius to the maximum sizes to make the effect more dramatic. Finally, I added a border by increasing the canvas size and added text to the image.

Monday, October 25, 2010

Scanography

One Scan:
For this project I gathered Halloween items and arranged them on a Lexmark scanner. It took me several tries to get the items in an order that I liked them. I was amazed at how challenging it was to place things where I wanted them, but overall I was pleased with the final product. This scan has no edits.
Spooky; 10.25.2010; 2:32 p.m.; Rexburg, ID; Lexmark Scanner


I had a fun time with the one scans, so I am including a second one that I did. I gathered items from my apartment that represent things that make me happy (family, playing games, jewelry, and coloring!) This scan also took me several tries to arrange the items where I wanted them, but I was happy with the way it turned out.
Happiness; 10.25.2010; 2:05 p.m.; Rexburg, ID; Lexmark Scanner

Collage Scan: 
Pineapple; 10.25.2010; 2:34 p.m.; Rexburg, ID; Lexmark Scanner

Artichoke; 10.25.2010; 2:45 p.m.; Rexburg, ID; Lexmark Scanner

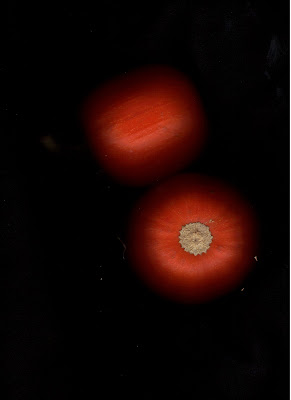
 Pumpkins; 10.25.2010; 2:36 p.m.; Rexburg, ID; Lexmark Scanner

For this collage scan I did individual scans of the two tiny pumpkins, a pineapple, and an artichoke. I then opened each of the individual photos in Camera Raw and adjusted exposure and added contrast to brighten the images. I took them from Camera Raw into Photoshop and drug the layers on top of one another to create one image. I placed the different produce images in the areas I felt they best fit and used the erase tool to show the images in the layers beneath. I then merged the layers and added an adjustment layer to increase the saturation a bit more of the overall image. I used a combination of the spot healing tool and the paintbrush tool to soften some of the harsh "glares" created from the scanner light and also to match the black background color throughout the entire image. I thought the final product turned out nicely. And who know you could do these sort of things with a scanner?!

Tuesday, October 19, 2010

Editing Enhancements

PORTRAIT ENHANCEMENTS
 Kylee Door; 10.16.2010; 11:41 a.m.; Rexburg, ID; f/7.1; 1/100; Canon Rebel T1i


For this image I took it into Camera Raw and added contrast and increased vibrancy. Then I took the photo into Photoshop and added a few minimal portrait enhancements. I enhanced her eyes and slightly smoothed out a bit of her skin--she is such a naturally beautiful girl that it was easy to take portraits of her!

REPLACE COLOR
Original
Teague crawling; 9.18.2010; 4:13 p.m.; Richland, WA; f/2.8; 1/160; Canon PowerShot SX120 IS

For this image I used the Color Replacement option in Photoshop to change Teague's shirt color. I used the eyedropper to select the blue color in his shirt and then adjusted hue, saturation, and brightness until I was satisfied with the color. I think I like the original color better, but this was a fun skill to learn.

MATCH COLOR
Original
Liz; 9.29.2010; 2:57 p.m.; Bannack, MT; f/3.5; 1/200; Sony DSC-HX1 


Color Match Photo
Phil; 9.29. 2010; 2:52 p.m.; Bannack, MT; f/4.0; 1/80; Sony DSC-HX1


Final Match Color 

I loved the way this color match project worked out. I took the original image of Liz while we were at Bannack. When I loaded the image onto my computer I noticed the coloring was out of balance. I also took this photo of Phil in the same location and loved the coloring in the photo. So I used the Match Color feature in Photoshop to combine the two and create this final image. It captured the great colors and light of the second image and added them to the original, and I was pleased with the outcome.


Monday, October 18, 2010

Portraits

Kylee; 10.16.2010; 11:37 a.m.; Rexburg, ID; f/7.1; 1/100; Canon Rebel T1i
Edits:  Camera Raw- increased contrast, vibrance and saturation. Photoshop-enhanced skin and eye color, added vignette

 Kylee Silo; 10.16.10; 11:38 a.m.; Rexburg, ID; f/8.0; 1/100; Canon Rebel T1i
Edits: Camera Raw-increased brightness and contrast, decreased vibrance and added saturation    Photoshop-enhanced eye color and skin tones, added vignette.

My sister Kylee came to visit for the weekend so I roped her into helping me out with some portraits! She is naturally gorgeous so it was easy to take good photos of her. I love the way both of these photos turned out. She is a natural!

RR Michelle & Sam; 10.16.2010; 5:34 p.m.; Rexburg, ID; f/5.0; 1/80; Canon Rebel T1i
I took this photo into Camera Raw and increased the contrast and vibrancy of the image. I decreased the brightness and added a bit of black to it. I then took it into Photoshop to crop and add a vignette.

ENVIRONMENTAL PORTRAIT
 Baby Teague; 9.18.10; 3:53 p.m.; Richland, WA; f/2.8; 1/40; Canon PowerShot SX120 IS
Edits: Camera Raw- increased exposure, contrast, brightness. Photoshop-enhanced eyes and clone stamped spot on skin, added vignette

For this shot I took a picture of my adorable nephew Teague in his "environment." He stopped and posed in his little jumperoo just for the camera. I love the way his little toes are curled and you can see those chubby thighs :)

 GROUP PHOTO
 Michelle & Sam; 10.16.10; 5:31 p.m.; Rexburg, ID; f/7.1;  1/100; Canon Rebel T1i
Edits; Camera Raw- increased exposure and adjusted highlights and shadows, decreased vibrance and increased saturation. Photoshop- enhanced eyes and skin tones, added vignette for an overall effect

I rounded up two of my gorgeous roommates to help me with this assignment. They were naturals and so easy to work with. We had such a fun time!


Tuesday, October 12, 2010

Camera Raw Editing

Vanity; 10.12.2010; 11:40 a.m.; Rexburg, ID; f/3.5; 1/8; Canon PowerShot SX120 IS

This image was taken in my apartment. I walked out of my room and thought it would be fun to have a picture of what a girl's apartment looks like. I love the story the image tells and the things associated with it, and tried to get some Bokeh in the image. I took the image into Camera Raw and first increased the exposure a little bit. I made some minor changes with the highlights and shadows by adjusting the fill light and recovery tabs. I added some blacks and increased the contrast and vibrancy of the image.


Balloons; 10.12.2010; 11:37 a.m.; Rexburg, ID; f/2.8; 1/13; Canon PowerShot SX120 IS

This image was taken at my apartment on my roommate's birthday. I opened the image in Camera Raw and adjusted the exposure a bit. I also added some fill light and recovery to help with the shadows and highlights and added contrast and clarity to the image as well. I also cropped off a portion of the image.

 Stranded; 9.29.2010;  2:14 p.m.; Bannack Ghost Town, MT; f/8.0; 1/160; Sony DSC-HX1

This shot was taken during our Bannack trip. I loved the angle on the photo, but knew that it needed some extra boosts to help make it pop. I opened the image in Camera Raw and adjusted the exposure down a bit and made some adjustments to the shadows and highlights. I also added some clarity to the image to make it crisper, and I love the detail that it brought out in the wood. I finished by opening it in photoshop and adding a vignette. I think the final outcome turned out much better than the original image.

Monday, October 11, 2010

Panoramic


1. Pano1; 10.8.2010; 4:59 pm; Rexburg, ID; f/3.2; 1/100; Canon PowerShot SX120 IS
2. Pano2; 10.8.2010; 4:59 pm; Rexburg, ID; f/3.2; 1/80; Canon PowerShot SX120 IS
3. Pano3; 10.8.2010; 4:59 pm; Rexburg, ID; f/3.2; 1/80; Canon PowerShot SX120 IS
4. Pano4; 10.8.2010; 5:00; pm; Rexburg, ID; f/3.2; 1/80; Canon PowerShot SX120 IS

These four shots are the view from my apartment bedroom window. The camera was handheld for all four shots. I blended the images into a nice panoramic by using the Photomerge options in Photoshop adn then cropped the image to emphasize the parts of the selection I wanted. Finally I added two adjustment layers to tweak the saturation and vibrance of the photo, with a vignette as the finishing touch. I was pleased with the way it turned out!

Tuesday, October 5, 2010

Bannack Faves

Here are some of my favorite shots I took from Bannack. I didn't necessarily use them to fit any of the assigned photo projects, but wanted to include them because I love the way they turned out!

Curtains; 9.29.2010; 2:37 p.m.; Bannack, MT; f/2.8; 1/160; Sony DSC-HX1; Edited in Dynamic Photo

Chair; 9.29.2010; 1:47 p.m.; Bannack, MT; f/8.0; 1/13; Sony DSC-HX1; Edited in Dynamic Photo

Doorway; 9.29.2010; 2:54 p.m.; Bannack, MT; f/4.5; 1/2000; Sony DSC-HX1; Edited in Dynamic Photo

Reflection; 9.29.2010; 12:54 p.m.; Bannack, MT; f/8.0; 1/60; Sony DSC-HX1; No Edits

Keyhole House; 9.29.2010; 1:27 p.m.; Bannack, MT; f/8.0; 1/30; Sony DSC-HX1; Adjusted Saturation in Photoshop


Macro Abstract

 Doorknob; 9.29.2010; 3:02 pm; Bannack, MT; f/4.5; 1/25; Sony DSC-HX1
 Peeling Paint; 9.29.2010; 9:37 a.m.; Dubois, ID; f/8.0; 1/500; Sony DSC-HX1


Using the adjustments layers in Photoshop, I blended these two photos together. to create a Macro Abstract. I used the overlay blending mode I really liked the effect that the peeled paint gave the doorknob. It gave it a nice texture and brightened up the overall colors of the picture.

Lone Nail; 9.29.2010; 2:57 p.m.; Bannack, MT Hotel; f/3.5; 1/200; Sony DCS-HX1

Textured Wall; 9.29.2010; 1:07 p.m.; Bannack, MT; f/3.2; 1/250; Sony DSC-HX1

I combined these two images by using the Overlay blending mode in Photoshop. I adjusted saturation levels to brighten the image a bit and was happy with the texture that the wall gave to the overall look.

High Dynamic Range

Dubois Tire; 9.29.2010; 9:47 am; Dubois, ID; f/8.0; 1/2000; Sony DSC-HX1


Yellow Room +3; 9.29.2010; 1:47 p.m.; Bannack, MT; f/3.2; 1/40; Sony DSC-HX1

Yellow Room Regular; 9.29.2010; 1:47 p.m.; Bannack, MT; f/3.2; 1/50; Sony DSC-HX1

Yellow Room -3; 9.29.2010; 1:47 p.m.; Bannack, MT;  f/3.2; 1/60; Sony DSC-HX1

 Yellow Room HDR

I love the way that HDR makes photos look.The tire came from a single image taken in Dubois. I opened the photo in Dynamic Photo and just started adjusting different things. I loved the way it turned out. The Yellow Room shots were taken in the hotel at Bannack with three different exposures. I love the effect that HDR gives and the vibrant feel that it gives photos. 


Reverse Shallow Depth

Brick Focus Background; 9.29.2010; 9:35 a.m.; Dubois, ID; f/ 2.8; 1/1250; Sony DSC-HX1

Brick Focus Foreground; 9.29.2010; 9:36 a.m.; Dubois, ID; f/2.8; 1/1600; Sony DSC-HX1
Both of these shots were taken in Dubois. I took two shots of the exact same scene with reverse focus points. I used Aperture Priority to select a  small f/stop number so there would be a shallow depth of field. I first pointed the center of the frame on the rocks in the background and held the shutter halfway. Then I re-framed the shot and finished pressing the shutter. I did the same for the second shot, only first focused on the brick directly in front of the camera and then re-framed the shot. I adjusted saturation slightly in both photos and burned the borders.